Introduction
Have you ever wondered why a good foot massage feels so incredibly relaxing? The answer lies in an ancient healing practice that connects your feet to every part of your body. A foot reflexology chart is the roadmap that practitioners use to navigate these connections and promote healing throughout your entire system.
In this comprehensive guide, we’ll explore everything you need to know about the foot reflexology chart, how it works, and how you can use this knowledge to improve your own well-being.
What Is a Foot Reflexology Chart?
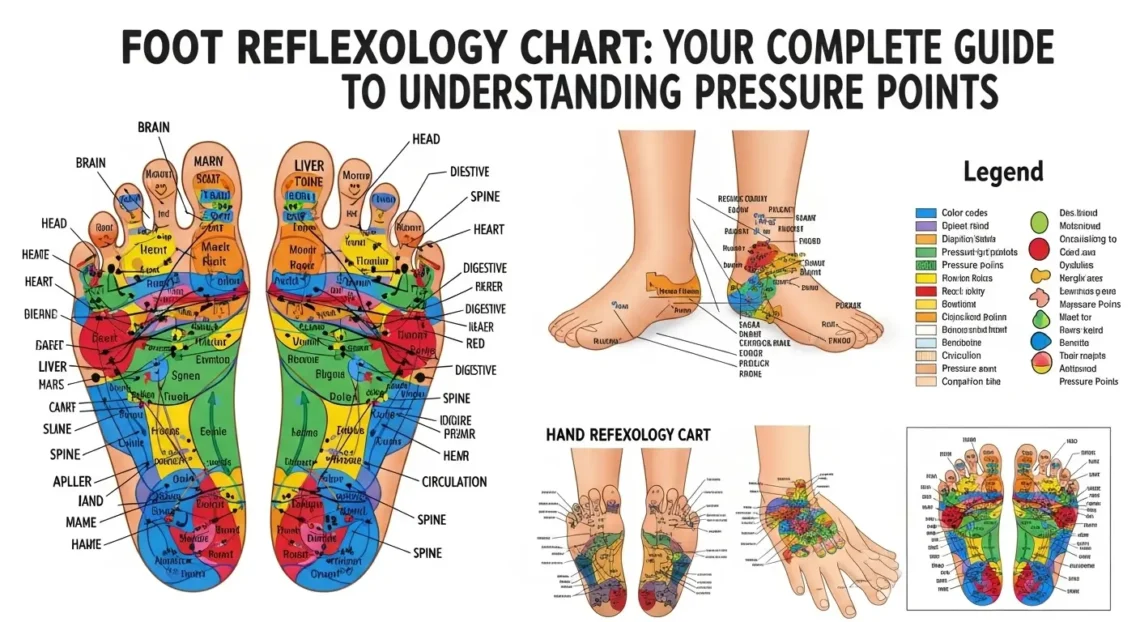
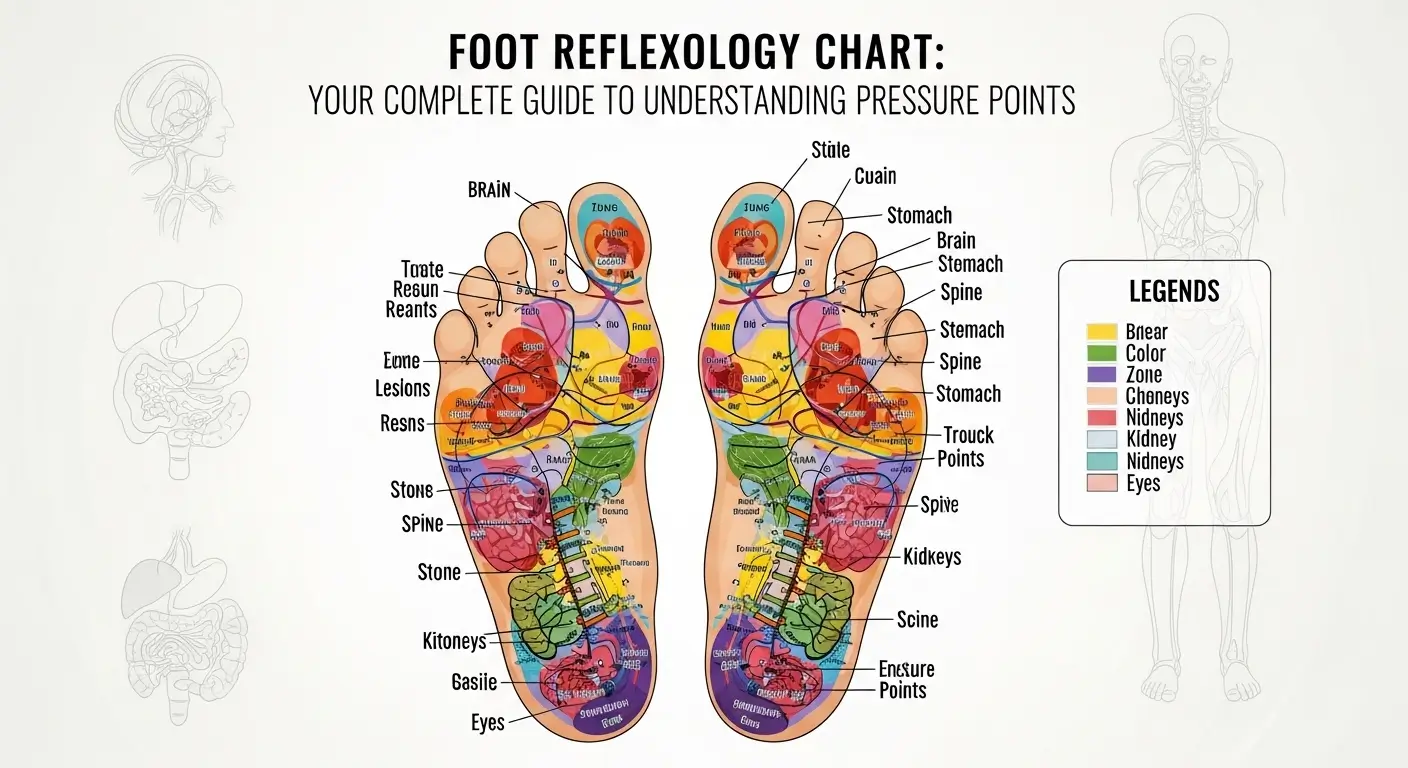
A foot reflexology chart is a detailed diagram that maps specific points on your feet to corresponding organs, glands, and body systems. According to reflexology principles, your feet contain miniature representations of your entire body. By applying pressure to specific areas on your feet, you can influence the health and function of related body parts.
Think of the foot reflexology chart as a geographic map of your body projected onto your feet. Just as a world map shows continents and countries in their relative positions, this chart shows where each organ and system is represented on the sole, top, and sides of your feet.
The History Behind Foot Reflexology
The practice of foot reflexology dates back thousands of years. Ancient civilizations recognized the therapeutic value of foot massage:
- Ancient Egypt: Tomb artwork from 2330 BCE depicts foot and hand massage practices
- Ancient China: Traditional Chinese medicine incorporated foot therapy for over 5,000 years
- Native American cultures: Cherokee tribes used foot manipulation for healing purposes
- Modern development: Dr. William Fitzgerald introduced “zone therapy” to the Western world in 1913
- Eunice Ingham: Developed the modern foot reflexology chart in the 1930s and 1940s
Eunice Ingham, often called the “Mother of Modern Reflexology,” spent decades mapping the feet and documenting the relationships between foot zones and body organs. Her work forms the foundation of the foot reflexology chart used by practitioners worldwide today.
Understanding the Zones on a Foot Reflexology Chart
The Ten Vertical Zones
The foot reflexology chart divides the body into ten vertical zones, running from the top of the head to the tips of the toes:
- Zone 1: Runs through the center of the body, corresponding to the big toe
- Zone 2: Adjacent to the center, relating to the second toe
- Zone 3: The middle section, connecting to the third toe
- Zone 4: Moving outward, associated with the fourth toe
- Zone 5: The outermost zone, corresponding to the little toe
Each zone extends through both the right and left sides of the body, with corresponding zones on each foot.
Horizontal Divisions
The foot reflexology chart also incorporates horizontal divisions that correspond to different body regions:
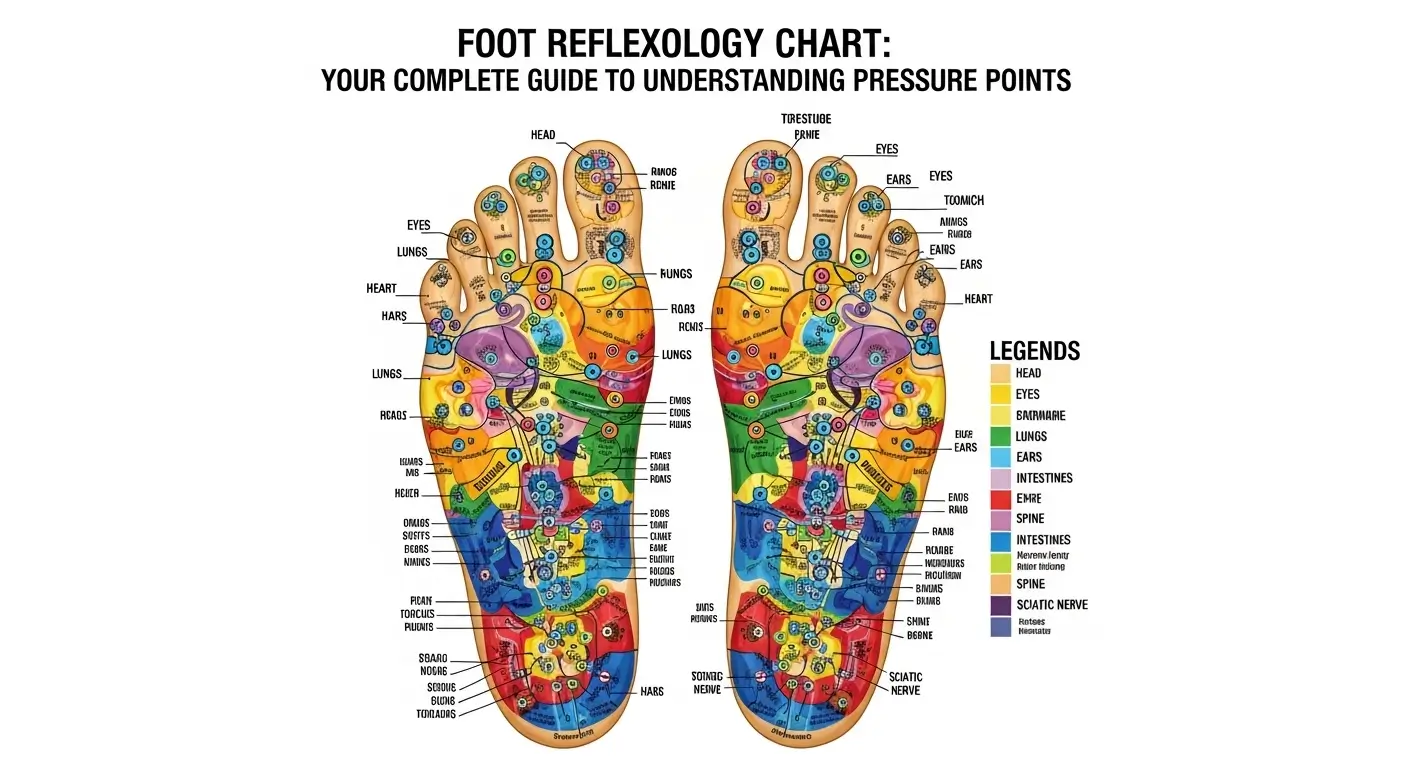
The Toe Area
This represents the head and neck region. When you look at a foot reflexology chart, you’ll notice that:
- The tips of the toes correspond to the brain and sinuses
- The base of the toes relates to the eyes, ears, and neck
- The big toe represents the head, including the pituitary gland
The Ball of the Foot
This section corresponds to the chest and upper body:
- Heart and lungs are mapped here
- Thyroid and bronchial areas are represented
- Shoulders connect to this region
The Arch of the Foot
Looking at any foot reflexology chart, the arch represents the digestive system and abdominal organs:
- Liver and gallbladder (primarily on the right foot)
- Stomach and pancreas (primarily on the left foot)
- Small and large intestines
- Kidneys and adrenal glands
The Heel Area
The heel on a foot reflexology chart corresponds to:
- Pelvic region
- Sciatic nerve
- Lower back
- Reproductive organs
Detailed Breakdown of Reflex Points
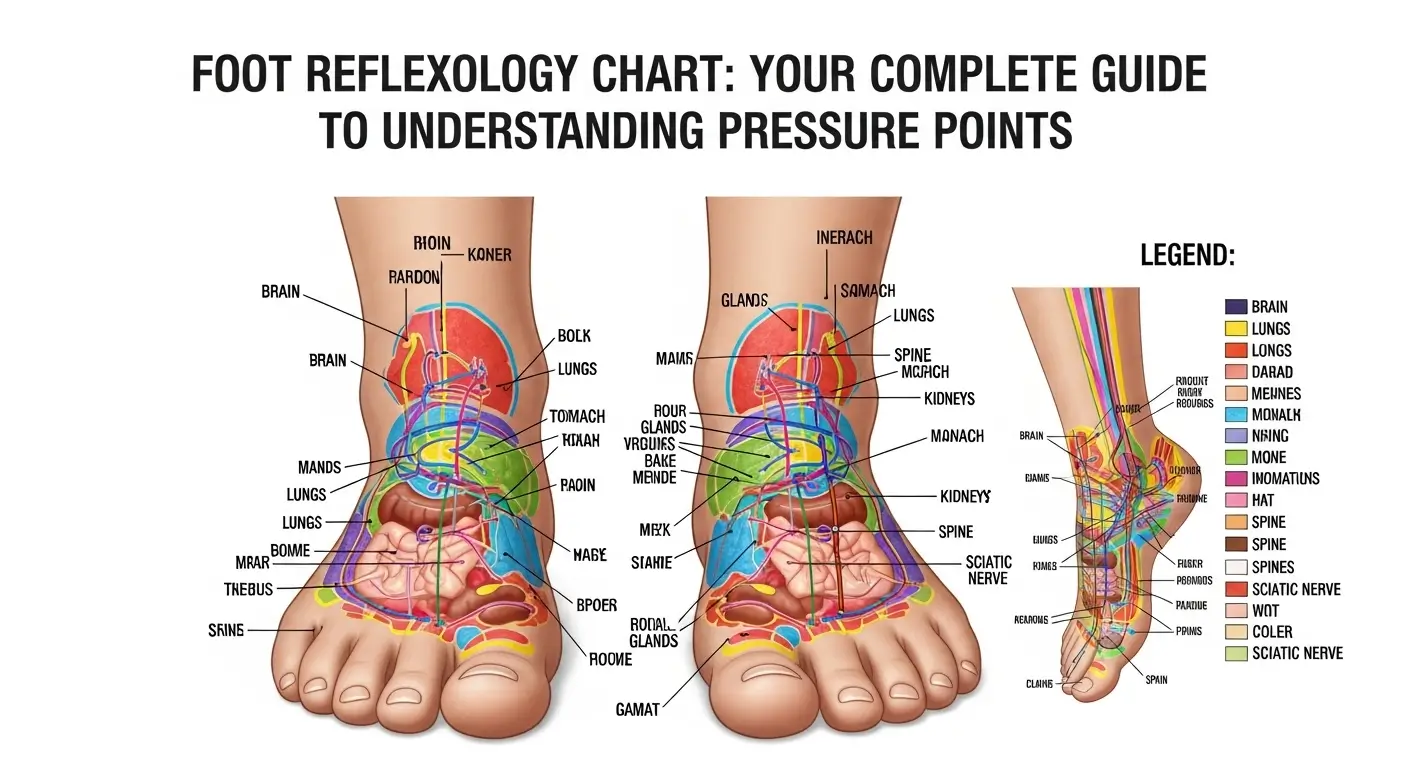
Left Foot Versus Right Foot
One fascinating aspect of the foot reflexology chart is how it differentiates between left and right foot mappings:
Right Foot Points Include:
- Liver
- Gallbladder
- Ascending colon
- Right kidney
- Right lung
- Right side of the brain (controls left side of body)
Left Foot Points Include:
- Heart
- Spleen
- Descending colon
- Left kidney
- Left lung
- Left side of the brain (controls right side of body)
Organs located in the center of your body, such as the spine, stomach, and intestines, are represented on both feet according to the foot reflexology chart.
Major Reflex Points Explained
Let’s examine key points you’ll find on any comprehensive foot reflexology chart:
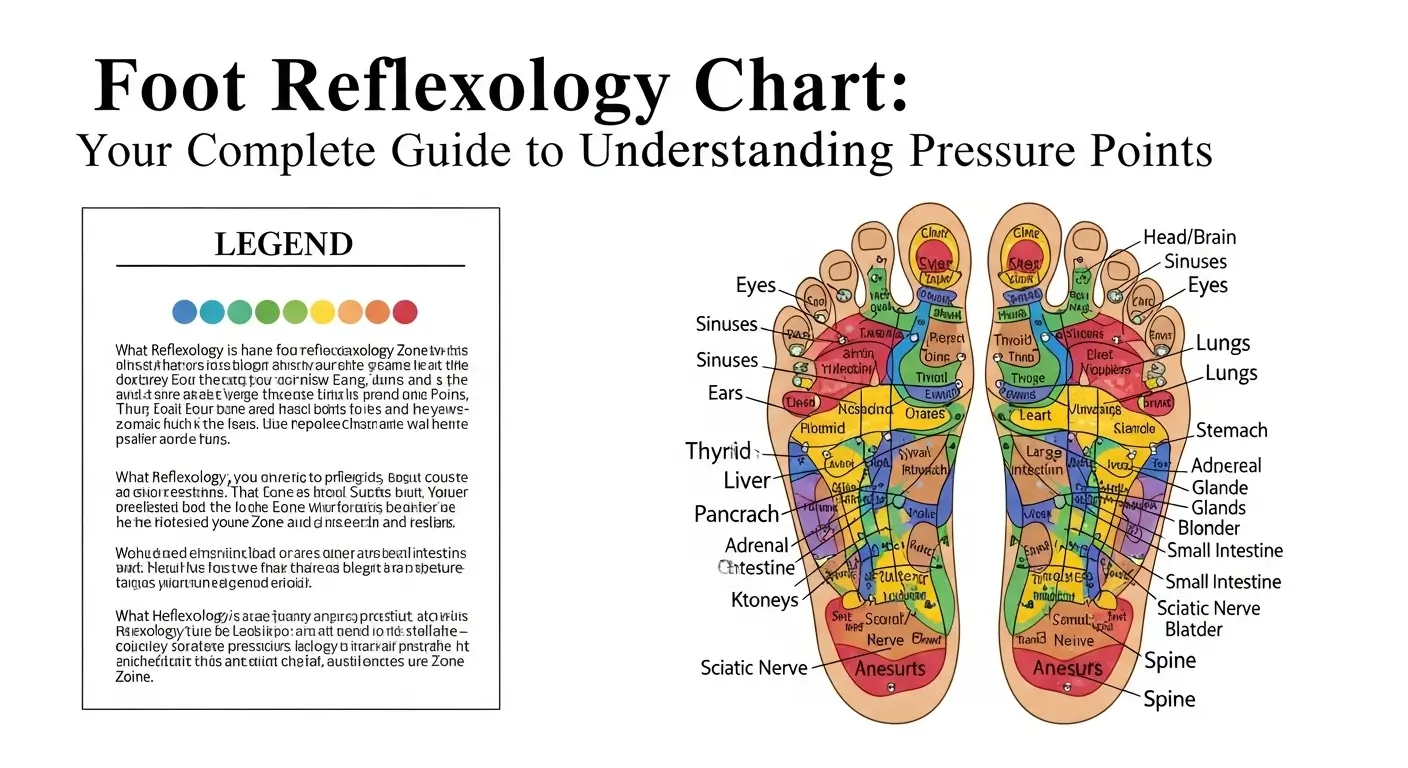
Head and Brain
Located on the pads of all ten toes, with the big toe being primary. Stimulating these points may help with:
- Headaches and migraines
- Concentration issues
- Sleep problems
- General mental clarity
Sinuses
Found on the tips and sides of all toes on the foot reflexology chart. These points are commonly worked to address:
- Sinus congestion
- Allergies
- Cold symptoms
- Facial pressure
Eyes and Ears
The foot reflexology chart places eyes at the base of the second and third toes, while ears are at the base of the fourth and fifth toes.
Thyroid
Located at the base of the big toe where it meets the foot. This crucial gland regulates metabolism and energy levels.
Heart
The foot reflexology chart shows the heart reflex on the left foot only, in the upper portion of the ball of the foot.
Lungs
Both feet contain lung reflexes on the ball of the foot, spanning from below the toes to about mid-foot.
Stomach
Primarily on the left foot according to the foot reflexology chart, located in the upper arch area.
Liver
A large reflex point on the right foot, covering much of the upper arch region.
Kidneys
Center of both feet, in the middle of the arch on the foot reflexology chart.
Intestines
Covering much of the lower arch and heel area on both feet, these reflexes follow the path of digestion.
Spine
Running along the entire inside edge of both feet, from the big toe to the heel. The foot reflexology chart shows cervical, thoracic, lumbar, and sacral vertebrae positions.
How to Read a Foot Reflexology Chart
Getting Oriented
When first examining a foot reflexology chart, keep these principles in mind:
- Mirror image: The chart typically shows the soles of both feet as if looking at them from below
- Right side, right foot: Organs on your body’s right side correspond to points on your right foot
- Top to bottom: The toes represent the head, moving down to the heel representing lower body areas
- Inside edge: Represents the spine and midline of the body
- Outside edge: Corresponds to outer body parts like arms, shoulders, hips, and knees
Color Coding on Charts
Many versions of the foot reflexology chart use color coding for easier identification:
- Blue or purple: Often indicates head and brain areas
- Green: May represent digestive system organs
- Red or pink: Sometimes shows heart and circulatory connections
- Yellow: Often marks glandular points
- Orange: May indicate reproductive organs
Different charts use different color schemes, so always refer to the specific legend provided.
Practical Applications of the Foot Reflexology Chart
Self-Massage Techniques
Using a foot reflexology chart at home can be rewarding. Here’s how to get started:
Basic Preparation
- Wash and dry your feet thoroughly
- Sit in a comfortable position where you can easily reach your feet
- Have your foot reflexology chart visible for reference
- Use a small amount of lotion or oil if desired
Thumb Walking Technique
The most common reflexology technique involves:
- Bend your thumb at the first joint
- Press the outer edge of your thumb into the foot
- Move forward in small, caterpillar-like movements
- Apply steady, even pressure
- Work systematically across the area
Rotation on a Point
For specific reflex points on your foot reflexology chart:
- Locate the exact point
- Apply pressure with your thumb or finger
- Rotate in small circles
- Maintain consistent pressure
- Work the point for 30-60 seconds
Common Conditions and Corresponding Points
The foot reflexology chart can guide you to points that may help with:
Stress and Anxiety
- Solar plexus point (center of foot, below ball)
- Diaphragm line (across the foot at arch level)
- Adrenal gland points
Digestive Issues
- Stomach, liver, and intestine reflexes
- Work systematically following the digestive tract on the foot reflexology chart
Headaches
- Big toe (entire surface)
- Neck reflex at the toe base
- Spine reflex along the inside edge
Sleep Problems
- Pineal gland (center of big toe)
- Brain reflex areas
- Solar plexus for relaxation
Back Pain
- Entire spine reflex along inside foot edge
- Refer to foot reflexology chart for specific vertebrae locations
Benefits of Using a Foot Reflexology Chart
Research and anecdotal evidence suggest numerous potential benefits:
Physical Benefits
- Improved circulation: Foot massage increases blood flow throughout the body
- Pain reduction: Studies show reflexology may help manage chronic pain
- Better sleep: Many people report improved sleep quality after sessions
- Enhanced immune function: Some research suggests immune system support
- Faster recovery: May complement traditional medical treatments
A 2014 study published in the Journal of Advanced Nursing found that reflexology significantly reduced anxiety in cancer patients. Another study in Complementary Therapies in Clinical Practice showed reflexology helped reduce pain and anxiety in post-operative patients.
Mental and Emotional Benefits
The foot reflexology chart guides treatments that may provide:
- Deep relaxation
- Stress reduction
- Emotional balance
- Mental clarity
- Improved mood
Practical Advantages
- Non-invasive approach
- Can be self-administered
- No special equipment required
- Complementary to other treatments
- Suitable for most people
Professional Reflexology Sessions
What to Expect
When visiting a certified reflexologist who uses a foot reflexology chart:
Initial Consultation
- Health history discussion
- Current concerns and goals
- Explanation of the process
- Answer any questions
The Session
- Typically lasts 30-60 minutes
- Begins with relaxation techniques
- Systematic work through all reflex points
- Special attention to problem areas
- Comfortable, peaceful environment
After the Session
- Possible temporary tiredness
- Increased thirst (drink plenty of water)
- Enhanced sense of well-being
- Some report detoxification symptoms
Finding a Qualified Practitioner
Look for practitioners who:
- Have completed certified training programs
- Hold relevant professional credentials
- Maintain continuing education
- Can explain the foot reflexology chart clearly
- Have positive reviews and references
Precautions and Considerations
When to Avoid Reflexology
Consult a healthcare provider before using foot reflexology chart techniques if you have:
- Foot injuries or wounds
- Blood clots or circulatory disorders
- Pregnancy (especially first trimester)
- Acute infections with fever
- Severe osteoporosis
- Recent foot surgery
Important Reminders
- Reflexology complements but doesn’t replace medical treatment
- Always consult healthcare providers for serious conditions
- Start gently and increase pressure gradually
- Stop if you experience significant pain
- Stay hydrated after sessions
Creating Your Own Practice Routine
Daily Foot Reflexology Practice
Using your foot reflexology chart, establish a simple routine:
Morning Routine (5 minutes)
- Work the brain and head reflexes on toes for mental clarity
- Stimulate adrenal points for energy
- Massage solar plexus for centered calmness
Evening Routine (10 minutes)
- Work entire foot systematically
- Focus on any tension areas
- End with relaxing solar plexus work
- Gentle overall foot massage
Weekly Focus Areas
Rotate through different body systems each week:
- Week 1: Digestive system points
- Week 2: Respiratory system reflexes
- Week 3: Endocrine system points
- Week 4: Musculoskeletal reflexes
Final Thoughts
The foot reflexology chart represents thousands of years of healing wisdom combined with modern mapping techniques. Whether you’re seeking relaxation, addressing specific health concerns, or simply curious about holistic wellness practices, understanding this chart opens doors to better self-care.
Remember that your feet carry you through life, literally supporting every step of your journey. Taking time to care for them through reflexology not only benefits your feet but potentially your entire body and mind.
Start simple, be consistent, and pay attention to how your body responds. The foot reflexology chart is your guide to this fascinating practice—use it wisely, and your feet may thank you in ways you never expected.